

Underwater Photography Buyers Guide 2021
- Simon Lorenz

- Mar 10, 2021
- 23 min read
Updated: Aug 24, 2023
Everything you need to know for your first step into underwater photography or when you want to upgrade to the next level of equipment. The choices can be daunting, but don't be put off by the below image - you will definitely not need as much.

This blog post aims to help divers looking to build their own underwater camera kit for photography. The information is intended to help those who are looking to get their first kit as well as photographers wanting to upgrade. The recommendations here are focused on photography rather than video. Please be advised that these are my personal recommendations, other professionals might suggest something else.
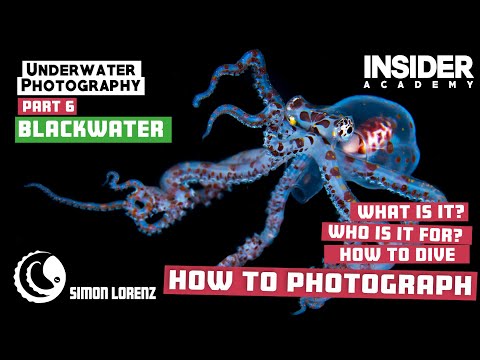
If you prefer a more visual approach, please watch this video.
Sections covered below
Cameras & lenses
Housings
Strobes
Accessories

Camera
First decision is the camera. Big decisions to make between compact, mirrorless and DSLR, as well as full frame. A typical question I might get “I have this 5 year old Korean DSLR that my grandfather gave me, can I take this underwater?” the answer is rather not.
Lets start with a couple of must-read recommendations
If you are new to photography, start with a compact
Stick with cameras that have track record underwater (read reviews)
Don’t buy a new (and expensive) housing for an old camera (not older than 2-3 years)
Look what your friends use – always great to learn and support each other
Do not buy second-hand compact or mirrorless cameras, DSLR is OK.
Compacts
For new photographers and for those who want to keep things simple as well as divers who want to be able to do macro and wide-angle in the same dive – I strongly recommend to get an upscale compact camera. Even for above-water pro photographers I generally recommend to start with a compact, as managing a system camera rig underwater is quite challenging. Modern compacts are powerful cameras in terms of video, photo, RAWs and even dynamic range (ability to correct in post).
The cameras that I recommend are Sony RX100 (currently mark 7) or Canon G7x (currently mark III) as these are powerful cameras above and below that have great photo and video capabilities and have stood the test of many underwater dives. If it is hard to decide you can either decide by price or by intended use – the Sony RX is a bit stronger when it comes to video, while Canon is a bit ahead in terms of macro.
Note: If video is not too important you can save yourself quite some hassle by getting Sony RX100 mkV as this one does not require a short port (see more below)

There are plenty of other compact cameras out there, but remember to only buy a camera that has already been widely used underwater. In the past several highly anticipated cameras surprisingly didn't deliver underwater eg. Canon G1x or Nikon J series.
What about Olympus Tough TG-6?
This is probably the most common camera underwater and it is of course very appealing – it is cheap, waterproof (and in a housing double safe) and impresses with its macro capabilities. The latest model even has 4k video that is really striking. If your budget is constrained or you rarely ever shoot wide-angle it is a good set up. My beef with TG is that the wide-angle is poor and manual mode very limited. Also, the dynamic range – the range of options in post-processing – is narrow. In my opinion the camera is limiting your ability to learn more and develop your abilities in manual mode, but for macro only it’s a great starter kit.
Hey, I have a GoPro!!
That is great but that is not a photo camera. It is a very reasonable video camera but the photos are basically still frames of a video camera. There is no RAW photo to edit and you cannot link it to strobes. While I have several GoPros and they come on every trip I will only take them to cover the situation in video and never as a still camera.
Mirrorless
The big revolution in the underwater space has been the emergence of so-called micro-four-thirds cameras. Lenses can be exchanged like on the larger DSLRs, but they are lighter, smaller and mostly cheaper than their larger predecessors and have therefore taken the underwater market in a storm. A huge advantage is the image review in the viewfinder, allowing you to keep shooting without moving the camera - very useful in macro.
The most popular brand here is Olympus with OM-D EM-1 and EM-5 (lower cost) cameras, which both deliver amazing results. For stills and especially macro these cameras are the bomb. A little limitation versus bigger cameras is the focus speeds – for shooting larger and faster animals these cameras often lag a bit. If you have a squeeze on the budget I would say EM-5 is the best value for money out there.
Mirrorless Full Frame
The focus speed limitations have all but been eradicated by the entrance of mirrorless full frame cameras – namely Sony Alpha A7 series which comes in various different iterations like the Sony A7 III as the base model, the Sony A7R IV for super high-resolution and Sony A7S III for video (R for resolution, S for Video). Since the mark III level these cameras now have focus speeds and dynamic range to rival full frame DSLRs, but also in price point .

When trying to decide between Micro 4/3 and FF the main argument will be the price. If you are considering shooting professional photography, wide-angle photography or something like sharks and manta rays – I would go FF. Also, for videography the full frame mirrorless cameras are unbeatable.
DSLR
So why are some people, including yours truthfully, still shooting with bulky DSLRs? Mostly because the FF mirrorless cameras only recently have become comparable in focus speed. As a wide-angle photographer focus speed is super important for me – and my Nikon D850 is still the fastest camera out there. For sharks and mantas I think I still have the best camera on hand. But Sony A7 and A9 as well as Canon R6 and others are very close now.
Another reason is price – any DSLR lenses are widely available second-hand and these babies last forever. So you can save a lot of money on those compared to the rather punchy cost of new FF mirrorless lenses. Finally, there are much more lenses available for DSLR – for example there is not native fish-eye lens for Sony A7 or Canon R6.
Cropped vs Full Frame DSLR
There is again the same choice to make – FF or cropped. Generally, cropped sensors are lower in price and have less dynamic range. They are often better for macro because the crop sensor functions like a magnifier, so a 60mm macro lens is like a 90mm lens on a full frame. Also I find that contrasts are better and depth of field more forgiving on a crop sensor camera. Personally I would chose a mirrorless camera over a DSLR crop for macro - the viewfinder showing the image is unbeatable and generally they produce crisper macro shots as well as being smaller and therefore easier to handle when trying to get close to small things.
For wide-angle photography I would always opt full frame if you can. If you are interested in video better chose mirrorless, DSLRs are not great in terms of focus, stability and features.
Nikon vs Canon
I get this asked a lot and its difficult. Currently the best and fastest DSLR is Nikon D850 but Canon is due to announce a new 5D. Also I would consider what your friends are using, so you can borrow lenses of each other.
Summary
If you want to keep it simple, or if you are new to photography for for compact. If you are ready to enter system cameras but are not a professional, go for mirrorless. Also when macro is your main interest opt for Olympus. For professional photos you can chose mirrorless FF or DSLR, but for fast moving subjects I would lean slightly towards DSLR FF.

Lenses
Now that you have a system camera you will want to have a choice of lenses. Underwater you want to have either a wide or a macro lens but then there are nuances and variations. Generally there are four categories to have - each one with their own advantages and usages.

Here are my suggestions depending on how far you are willing to go.
Two lens approach - ok for beginners
Fish-Eye
60mm macro or similar
Three lens approach (recommended) - necessary kit long term
Fish-eye
Wide-angle zoom
60mm macro or similar
Note: For DSLR crop cameras you can chose the Tokina 10-17mm which is a combination of fish-eye and zoom. Unique and possibly one of the best lenses for underwater. Does not work with full frame.
Four lens approach - including super macro
Fish-eye
Wide-angle zoom
60mm macro or similar
100mm macro of similar
Note: a 60mm macro on a crop sensor corresponds to a 90mm macro on full frame. So dont get a 100mm for a crop camera or it will be super-nano tiny macro only.

Housings
Before you ask, a couple of thoughts first
- Decide on the camera first, then the housing
- Don’t buy a new (and expensive) housing for an old camera
- Don’t buy a second hand housing. But if you do – send it for servicing first.
- Don’t buy a cheap housing for an expensive camera
- If the big brands don’t offer a housing for a certain camera, there is a reason.
- Only house compacts in plastic, system cameras belong in aluminum
Housing material
There are three types of housings – polycarbonate (plastic), acrylic and aluminum. The decision between the three mostly is driven by price. An important decision is how much the housing will be used, the more use it will get the sturdier it should be. If you plan to use the camera for a few years before upgrading then plastic housings are ok. For longer usages and for all system cameras I recommend aluminum.

Polycarbonate aka Plastic Housings


These housings are the most plentiful and cheapest in the market. While the offer the cheapest entry to this space it has to be noted that they have to be handled with more care than aluminum. One drop from the table or a bump with a tank can create a catastrophic flood on the next dive. Having said that I know many people that never had a leak.
Canon, Sony and other camera brands offer entry level housings for their cameras. These are often ok as a starting point, although some don’t give access to all controls. But, they are usually not very sturdy and lack the ability of adding accessories such as diopters and wet lenses and focus lights.
In this space I recommend FantaSea as a solid brand that offers all important features in a plastic housing. The front features a metal plate with a 67mm screw mount allowing the installation of all wet lenses desired. Double o-rings and Vacuum valves help to make it a secure as possible housing.
Olympus original housings are made by the same factory and are therefore similar quality, although FantaSea has smarter solutions.
Generally polycarbonates are fine for compacts but I would refrain from housing a system camera with anything else but aluminum. Once there are ports for the different lenses, they leakage and breakage potential increase also because the cameras are heavier. And same as the old insurance logic “The more you spend on the device, the more you should spend on the insurance.” Meaning the housing.
Note: Sea Frogs has been coming back so many times with small or catastrophic leaks – I do not recommend this brand.
Acrylic Housings
There are only two brand offering this solution Ikelite and Nimar, and before Fantasea came onto the market they were a good intermediate product between cheap plastic and expensive aluminum. However, now their limitations seems unnecessary. My main problem are the clunky dials, that require taking the index finger off the trigger to make adjustments, potentially losing the shot in the process. They are also excessively heavy and the lid-snaps are true finger killers.
Aluminum Housings


Almost all professionals use aluminum housings. They are carved out of a solid aluminum block, powder coated and anodized - they last forever and are virtually indestructible. Also, there is never any condensation and controls are usually more accurate than on plastic housings. They are heavier which you will notice when you traveling, they require more buoyancy compensation and they are usually twice the price of acrylic housings.
Nauticam vs Isotta
Nauticam is the world market leader in aluminum housings. When this brand entered the housing market around 2009 the air got real thin for established players like Seacam, Subal, Aquatica and Sea&Sea. Today they are still selling at similar price points but with much less features. Nauticam is the only manufacturer that has a real factory, while all others are workshops. This allows the Chinese producer to be fast to market and provide excellent mechanical solutions that nobody else has. The brand also makes more housings and accessories than any other brand. The only downside is the price and the complexity of their housings. The artful solutions are amazing until they have a problem in which case they will always have to go back to the factory which is time and money intensive.
Personally I have been using Isotta for 6 years and never looked back. Isotta is constructed in a simpler way than Nauticam, allowing it to be maintained and even partially serviced by a crafty photographer. This simplicity has an impact on the price, and the housings are a good 25% cheaper than Nauticam, Subal and the others. Other advantages are double o-rings on all parts which have kept my camera save and secure without the need of a vacuum seal. Backscatter article about Isotta

Building your rig
If you are ordering a complete new set you can add some features.
First you will have to go through the steps of building your housing which will include the ports and domes for your lenses. There is no short cutting, every lens has an exact set of port rings and covers. Different wide-angle lenses will be suggested with different domes - although unless you are an connoisseur you will be fine with a 6" dome. I generally suggest glass which is less likely to scratch.
For zoom lenses you need focus rings that allow you to zoom. There are also rings for manual focus, but I find them not very useful underwater.


Every manufacturer has port charts easily accessible on the website. Some pages like Backscatter let you build your system easily.
Other useful accessories are sync cord bulkheads for system cameras. If you are shooting with optical cables also want to consider getting an LED trigger. Make sure you order several ball joints aside from your strobe ball joints for focus light and GoPro mounts. And personally I really like cross brackets for mounting more lights but also for the best way to hold a camera inside and outside the water and when passing it out of the water.

Viewfinder
Another useful item to install when you can
afford it is an angled view-finder. Some brands like Nauticam and Seacam have their own, Isotta uses the trustworthy INON X-2 viewfinder which is also very good value for money.
These are extremely helpful when shooting macro as the housing should be level with the animal which in this case mostly is close to the ground. The viewfinder allows the photographer to hover over the ground and looking comfortably through the viewfinder. They also magnify the subject a little bit making framing and focusing a lot easier. I would refrain from using the viewfinder on blackwater dives or wide-angle dives as it is much harder to aim quickly and accurately and the body can be suspended below the camera without touching the bottom.

Vacuum Valves
I strongly recommend vacuum valves for most housings except for Isotta. Vacuum valves primarily serve to indicate a leak, contrary to the belief that they reduce the risk of leaks. The pressure inside the housing reduced with a pump well before a dive (30mins recommended) and if the internal pressure increases due to a leak the vacuum valve will notify of a leak. It is a great little insurance that your housing is secure. For Nauticam and FantaSea I definitely recommend vacuum.
Why don’t I use it? It is a lot of extra work and because Isotta is literally bullet proof due to double o-rings and an overlapping closing mechanism there is no need. Other housings have single o-rings and flat port connections that provide more risk for leakage.


Strobes
For underwater photography we need artificial light. There are exceptions like when you snorkel but anything deeper than 5m needs additional light to add back red and orange light. Video light is only good for video, so there is no way around getting a strobe. As a matter of fact for participants of my photo workshops I make it conditional to have a strobe.
Generally I always recommend to start with one strobe only, even if you are an experienced diver. The light from one strobe can be varied to create various effects. Also, the lighting is actually more interesting because with one strobe we get shadows vs with two strobes we get none. Once you have two strobes you actually tend to do less creative directions, so if you skip learning with one strobe you do not actually know what the single strobe does by itself. If you are interested to learn more about strobe light have a look at my video on lighting.
There are different powers of strobes, expressed in various ways. The classic is guide number (G.N.) indicating how many metres the strobe light will reach at ISO100 - above water. Others use the power output. These are totally irrelevant underwater because light travels differently in different visibility conditions but we can use it as orientation. The lowest are around 15 and the very highest are around 60, but I recommend to use strobes from 25 to 35 G.N. Brent Durand made a great overview of all strobe powers compared
It is more important to read what experts say about the strobes in practice, as the quality of the light diffusion differs dramatically. The beam of light varies between 80 and 120°, wider usually meaning softer light. Another important factor is the recycling speed, as in how long does it take the strobe to recycle after a full power flash. A stronger strobe will provide the same power as a weaker one but recycle much faster.

Entry Level

There are many entry level strobes with low G.N. and often people want to use these to limit their budget. These strobes are only for macro and will struggle to light up anything past 50cm with an absolute maximum of 1m.
The best ones in this space are the INON S2000 or Backscatter Mini-Flash 1 the latter even has manual power that few others have in this range and the option of adding a snoot. Often these strobes only have auto-power sometimes called iTTL (totally misleading, as nothing goes Through The Lens) which is maybe good for starters but limits your creative possibilities and you will not be able to do many specific shots.
Generally these strobes are good for beginners and as long as you know you will likely grow out of them soon it is a good way to start. Considering you will likely buy the step up within a year or two the price difference is not quite justified IMHO.
Mid Level formerly known as High End
I recommend going for a mid level strobe that has a G.N. of 25 to 35. These are allowing photographers almost all different kinds of photography and they come with the necessary features namely manual power but also slave function and focus light (do not be fooled, you still need a focus light – read below).
These strobes will light up subjects up to 3m away, making it useful strobe to shoot large subjects and reef scapes as well as wrecks and sharks. At full power you can also shoot against the sunlight, but at that power you will have to wait for the full recycle time of 1.5-2 seconds which means that for example a shark swimming through a sun burst you will only get one shot.
My recommended strobe for beginners and advanced photographers is the INON Z330 or the older Z240. These are the undisputed leaders due to their consistent quality. I actually prefer the light of Sea&Sea D2 and D3 but the brand has lost a lot of trust in the last year with repeated bulb burn-outs often within the first 100 shots. Many professionals now suggest the Retra Flash Pro which is the only small form factor strobe with a circular tube flash, but I have not been able to test it. Read my INON Z330 detail review on DPG here
Note: If you buy the INON strobe make sure to also buy the ball joint as they are sold separately.
Note II: If you buy any strobe second-hand make sure you have it on good authority that it has fired less than 10.000 shots (strobes usually last 50.000 to 100.000 shots). I generally do not recommend second hand for strobes.
Top Level – Tube Strobes
There is one more level above these, but I only recommend these for people without budget constraints and that shoot mainly wide-angle. The real attraction are the circular light tubes that arguably make the best light and the power which can reach up to guide number 64 in the case of the Isotta RED64 (not released yet). The tubes hold huge batteries but are also a creating neutral buoyancy. Check out the video from DEMA 2019 where I showcase the prototypes.
These are very expensive, but if budget is not limited I suggest the Seacam 160 and with budget constraints the Isotta RED64 or Ikelite 161.
If you want to learn more about strobes and natural light, check out part 2 of my video tutorial on underwater photography.
Next up - accessories

Accessories
Now to the final touches. We will cover here the most important accessories.
Clamps
Clamps are simple tools but very important. You again do not want to cheap out here, take good quality ones. They will make your underwater management of your strobes such much better.
Over the years I have many different ones and personally I prefer the Nauticam clamps. I particularly like their long clamps which you should place on the connection between the small the larger float arms – see below for set up.

There are also triple clamps for three way connections but I would use those only sparingly. If you mount for example a focus light on your triple clamp, it will move around every time you change strobe position. Strobes with rings are useful if you want to clip a carrying lanyard between the top two clamps (see below)
Arms
We need the arms to mount our strobes. And it is a great place to add some buoyancy to your rig.
There are so many to chose from, but generally my suggestion is to go for a two arm solution (see in below set up section) rather than the so-called flex arms. There is more reach, more flexibility, the system is expandable and adjustable and flex arms often break. Also there are many strobe positions not possible with flex arms.

When choosing arms I also recommend not to go too long as the arms quickly get hard to manage. For smaller set ups, macro rigs and beginners I would not suggest to get longer arms than 20cm, for larger rigs and wide-angle to a maximum of 30cm. On the other hand you need to get enough buoyancy for your rig not to be too negative.
Buoyancy is a big issue underwater and counter-intuitively the more you spend on your rig the heavier it gets. Aluminum and glass add to the weight at the same underwater displacement therefore adding to your negative buoyancy underwater. It also depends on how large your housing is, the more compact the more downward force you will experience. For example, a small compact aluminum housing has a more negative buoyancy that a polycarbonate mirrorless set with a polycarbonate dome. A large dome is like a huge float and actually might need to get added weights in order to avoid the dome being pulled up. Wetlenses, clamps, arms and strobes all add to the downward buoyancy Read this Backscatter article for a better understanding

Arms can either be float arms with hollow bodies or you can add foam floats to your normal arms. Personally, I think a combination is good, as most rigs will need extra buoyancy.
My personal set up (Isotta D850) has two large and two small float arms and then I add foam floats according to my usage.
Macro (compact & less displacement) – 6 foam floats
Wide-angle with 6” glass port – 4 foam floats
Wide-angle with 9” acrylic port – no floats
So chose at least one float arm to start and one normal warm and if possible give it a try in sea water before adding any more. Simple arms without floatation are the cheapest and sturdiest, but they add to your downward force.
Examples for different ball tube arms from Isotta and their respective buoyancy compensation.

One last thought on arms – it is best to buy arms from the same brand as the ball joint heads and thickness of the rubber ring vary across brands and clamps will not work as well when they are connecting two different size ball heads.
Cables & LED trigger
The strobes need to receive instruction to fire from the camera. In the majority of cases that is done via optical cable. The classic way is the built in camera flash firing inside the housing and that light triggers - via the optical cables - the slave mode in the strobe ("Slave mode" is not a sex game but the mode where the strobe fires when the camera flashes - like a slave following his.... domina).
Optical cables are plentiful and there are cheap ones out there, but again, no point in saving money here. You want to pick a multi-core type cable preferably that screws fixed onto your strobe and even housing. One nuisance with optical cables is that they pop out when moving the strobe arms. Another one is that they often break at flexing points so you want to get cables with strong coating and rigid heads.
LED Trigger
Another big downside of the traditional approach comes from using the built-in flash. It is a huge waste on camera battery life and the recycling speed (the time the flash needs to be ready for the next flash) of the internal flash is usually lower than the external strobe, so even if your strobe is ready to fire you might have to wait for your camera flash to recycle (always manually set it in the camera to the lowest output power). On mirrorless and DSLR cameras there are LED Triggers that bypass this problem and have their own battery. The fire LED lights instead with virtually zero recycling time, allowing you to shoot as fast as the strobe can handle it ie if you are in low power you might be able to shoot as many as 3 or 4 times per second.
Sync Cord
Another way to avoid all these troubles is with a sync cord that is a thick sturdy cable that screws into the housing and the strobe providing a reliable and permanent connection. This solution also theoretically allows real TTL (through the lens metering) strobe firing, but I find it a rather useless feature underwater as the metering does not take into account the different strobe distances to the subject or the visibility underwater. But the advantage of a sturdy, screwed in cable is huge as you never have to worry about the cable disconnecting. The main limitation is usually that your housing does not support sync cords, I always suggest to order them with a new housing.
There are stories of leaking sync cables and sockets. I use Sea&Sea and Isotta cables and have had no problems, only some that I created myself e.g. jumping in with whalesharks and forgetting to cover the open sync port after removing the strobes.

Redundancy

The worst thing that can happen on a trip if if your connection between your camera and your strobe fails. That is why I suggest to have spares of everything, two set of cables at a minimum. If you can I suggest that you have sync and LED sockets as back up. If you break your sync cord you can fall back on LED or the other way around.
For myself I go to even more extremes - I use a Sea&Sea Y-sync cable which connects both strobes with one sync socket, so that if I flood that socket I can move it to the other. Super redundancy, but like in tech diving, I cant afford for my equipment to not function.
Focus lights
Final touches now – focus lights. In order for the camera to focus in darker conditions it needs to be able to pick up on the contrast and shadows of details (ever tried focusing on a white wall?). High resolution DSLRs do a better job at this than compacts and micro 4/3s but still every kit needs a focus light.
Although most middle segment strobes have built in focus lights these only serve as back up. The problem is that we rarely want to point the strobe directly at the subject, therefore it is no feasible to use the focus light.


Generally, I recommend a simple wide-beam torch as focus light. I do sometimes take a 5K video light instead, particularly if I want to take long shutter speed photos or plan to take videos as well. But in most cases a small wide-beam torch will be easier to manage, not interact with your other equipment and the battery will last longer. Mind you that stronger video lights can also create backscatter and will have to powered down to a low level.

Wet Lenses
In order to widen your photographic potential, you should consider adding wet lenses or diopters to your set up. They are called wet lenses as you can mount them in the water allowing you to change lenses underwater (as opposed to dry lenses that have to be mounted above water). While this is maybe not something for your first trip with a camera you will soon need these for your photography.
One important thing to keep in mind - your housing needs to have a 67mm screw mount, preferably of aluminum. Some housings do not have this and will therefore not be expandable to wet lenses. Also take note that some small housings like Olympus TG require a smaller connection of 52mm.

Macro Diopters
There are practically no underwater macro photos that have not been taken with a macro diopter. This is a tool that you should have in your camera bag. These reduce focus distance and increase magnification.


If you ever tried to focus up close with your camera you will see that the camera cannot focus very close to the lens. Compact cameras have a macro function that allows to get closer, but the lens still lacks magnification as they usually just go to 28mm. System lenses like 60mm and 100mm will have 20-40cm focus distance meaning that everything that is closer will not be sharp. Macro diopters reduce the focus distance dramatically and add some magnification. For example, a +5 diopter only reduces focus distance while a +10 or +15 will add to the magnification. +20 and higher will reduce the focus distance to 2-3cm which in most cases is actually not feasible (imagine pointing your huge camera rig only one thumb width away from the subject).


As a starting point I generally recommend +10 for all photographers. I also recommend getting a flip adapter right away, so you can easily flip on the diopter when needed. Some people put them in the BCD pockets where the get scratched up and lost very easily.
Because it is quite cumbersome to screw the macro lens into place almost everyone will use flip adapters to be able to flip one or even two lenses during the dive. Attaching the macro port manually underwater also often leads to people losing them during the dive or simply leaving them on the sea floor next to the last subject. better get a flip adapter. Saga and Nauticam make the best ones.


Fish-Eye Diopters
If you have a compact camera I strongly suggest to get a Fish-eye diopter before your next wide-angle trip. For large subjects such as whales and wrecks but also reef scapes you do not want to miss having one of these. They allow you to get more of the scenery in the picture, make the subject center larger and let you get much closer which in turn means easier to light up. There are quite a few out there, you want to get one that has a dome rather than a flat front which helps make the wide angle image more crisp in the corners. Backscatter, Weefine, FantaSea, AOI, Kraken all have good lenses, Nauticam lenses are more pricey but the quality is also very good.

Note: you cannot mount fish-eye adapters on flips, they are too heavy and the additional distance of the flip adapter create vignetting
Wide-Angle Converters
There is a new concept that mainly has been pushed by Nauticam which are wide-angle converters like the WACP. These allow to be wet mounted on mid-focal length lenses which is very good for wide-angle video. If you want to have a shocker, check out what they cost!! This is strictly professional level equipment.
There are a ton of options. If you want to understand more read this comprehensive write up by backscatter.
Short Ports
One thing to keep in mind for all compact cameras - you need to check if your camera needs a short port. Mostly this is for wide-angle and fish-eye adapters. The wide-angle adapters often create a vignetting effect (see below) which is a combined result of the retracted compact camera zoom lens and the fish-eye being very wide - essentially you are taking a photo of the insides of your port.


In some rare cases you might also need a short port for macro (e.g. Sony RX100 mk6 and 7).
Snoots
Another very useful tool for macro Photographers is the snoot. Essentially it's a tube that narrows the light beam of the strobe to a smaller spotlight. This allows to isolate the subject from the background and create various impactful effects. This is particularly useful for animal that live on boring substrate.


Over the years crafty developers have added glass lenses to amplify the light beam and aperture cards or stencils to vary size and form of the beam. For many years I would say this is something for beginners but recently a new strobe has emerged that was built with the snoot in mind. For 5 years the Retra LSD - because it managed to direct the built in target light acccurately at the subject as a preview of the shot - something that most snoots had failed before.

Now it has been unthroned by the purpose built Backscatter mini-flash and snoot package. The strobe was mentioned earlier which is a great beginner that uses conveniently standard 3500 mAh batteries. The real reason to buy it is to have a 100% accurate snoot, which you can buy as a bundle with the strobe. The snoot is so easy to point at your subjects making snoot photography a breeze and eligible to even beginners. One drawback - you cannot fire it with synd cords.

Set up
Finally, how to put it all together. I suggest watching the last part of my video for visualization – I explain the single and twin strobe set up there in detail.
- Per strobe 2 arms and 3 clamps
- Float arms on the inside and the thinner arms on outside for easier strobe management and to keep the buoyancy close to the center.
- Wider clamp in the middle
- Ball joints where ever they are not included (e.g. strobe, housing, focus light)
- Buy all arms from the same brand – otherwise clamps might not work well

In addition you will want to double up on all batteries that are relevant - focus light, camera, LED trigger, strobes.
Beginner Kit
My preferred beginner kit will include

Canon G7x or RX100
FantaSea or Nauticam/Isotta Housing
Tray
three clamps
one float arm and one normal arm
lighting cable
focus light
lanyard
Spare batteries for strobe, light and camera
OPTIONAL
wet macro lense
wide angle converter
If you want to go with the Olympus Tough TG-6 instead my friends from Backscatter have this great starter kit available.

Conclusion
I hope you found this article useful. While it is long there are still many parts I left out in order to focus on key topics. If you are interested in more topics drop me an email or contact me on one of my social media pages. If you want to support our business you can follow our facebook, youtube and Instagram and tell yours friends about Insider Divers.
If you liked this blog you might want to check out some of my video tutorials on underwater photography, on editing or watch some of our guest speakers.
About the Author

Underwater photographer Simon Lorenz is a regular author for dive magazines and speaker at events. His photography has won several awards. A PADI instructor and photo coach his aim is to further the dive and photography skills of his guests. His travel company Insider Divers offers guided group trips, combining unusual dive experiences with photo training. A seasoned traveler he speaks 6 languages and has dived all continents. In Hong Kong he operates Pool Portrait, the first underwater photo studio. Simon supports various marine NGOs and is on the advisory board of the Hong Kong Shark Foundation.
More photos, videos and prints by Simon here


This is an incredibly thorough and well-structured guide for anyone entering underwater photography. The advice to start with a compact camera and a reliable housing like Fantasea is spot-on – it prevents overwhelming beginners with complexity and cost. The detailed breakdown of strobes and arms is especially valuable; it demystifies a crucial part of the setup. It’s like needing to convert mkv to mp4; having the right, reliable equipment from the start ensures a smooth, frustration-free experience and a high-quality final result. Great resource!